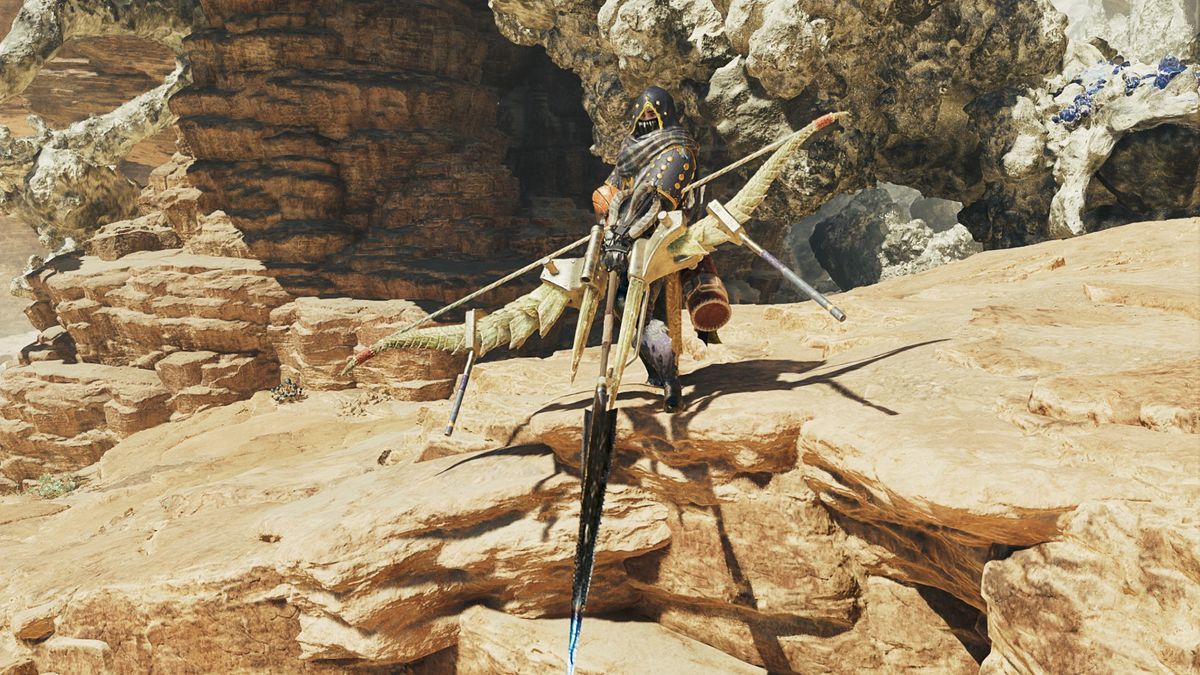
When you’re in search of the finest Bow construct in Monster Hunter Wilds, two issues are in all probability true. One, you are excited about dealing harm with out placing your self immediately in disemboweling vary. And two, you in all probability checked out bowguns and thought “This could be loads” whenever you noticed the ammo screens. Welcome to the Bow, aka the ranged weapon that’s Simply The Proper Quantity.
(It is nonetheless loads.)
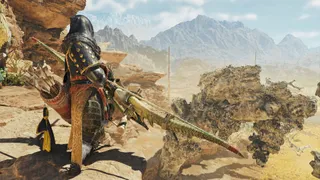
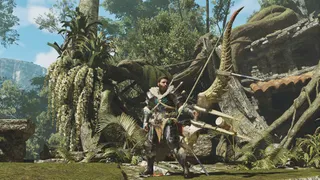
The Bow is a mid-range powerhouse in Monster Hunter, dealing in regular, repeated harm whereas particular assaults just like the Dragon Piercer present occasional high-power bursts. It is also a really cellular weapon—typically, optimum Bow play entails extra deliberate dodging to energy up your arrows than it does charging them by holding down a button.
-
Finest starter Mild Bowgun builds in Monster Hunter Wilds
-
Finest starter Heavy Bowgun builds in Monster Hunter Wilds
Beneath, I am going to run you thru the fundamentals of Bow assaults and playstyle in Monster Hunter Wilds earlier than setting you up with a slate of armor and weapon ideas to make your path by Low Rank a nice one.
In search of extra looking suggestions? Try our Monster Hunter Wilds information hub for all of the G-Rank recommendation we have crafted to date.
play Bow in Monster Hunter Wilds
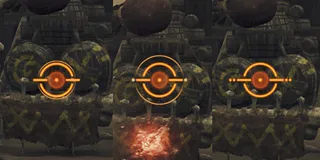
The primary and most necessary factor to know concerning the Bow is efficient vary. Just like the Bowguns, the Bow’s handiest whenever you’re not too removed from or too near the monster you are capturing at. You will know you are inside your Bow’s efficient vary when your concentrating on reticle turns orange whereas aiming with LT on a controller, like this:
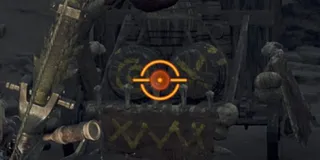
You will wish to make sure you’re capturing from efficient vary as typically as doable. In any other case, you are doing far much less harm than you can be.
Now, let’s speak about fundamental mechanics and controls.
Fundamental Bow assaults and comboing
On a controller, intention your bow with LT. It will pull up your concentrating on reticle, and it will additionally spotlight monster wounds for destroying with Focus Strikes. Cost your pictures by holding RT and launch to shoot. There are three cost ranges, indicated by dots that seem to both aspect of your reticle as you cost. The upper your cost degree, the extra harm your shot will do.
Nevertheless, dodging whereas charging a shot or instantly after a shot will carry out a Charging Sidestep, elevating your cost degree. Because of this, as an alternative of manually charging each shot, you may do extra harm by regularly dodging and capturing at max degree as an alternative.
- Efficiently dodging a monster’s assault with a Charging Sidestep will carry out a Discerning Dodge, which restores your stamina and fills a few of your Trick Arrow Gauge. Extra on that under.
- Press B throughout a shot combo to carry out a Energy Shot, instantly firing a diffusion of arrows at your present cost degree. Instantly press B once more for a Energy Volley, firing one other unfold. These are good choices if a monster is shut sufficient to eat all of the arrows, and it is also a great way to complete off a sequence of pictures as soon as as you are nearing the top of your stamina bar.
Press B+Y whenever you’re not charging a shot to carry out a Dragon Piercer—a robust particular assault that punches by the monster and damages it regularly because it does so. Performing a Dragon Piercer throughout a combo will vastly velocity up its animation. If the monster topples whilst you’re capturing it, it is a good time for a Dragon Piercer.
The Trick Arrow Gauge, Tracer Arrows, and Coatings
New to Bow in Monster Hunter Wilds is the Trick Arrow Gauge. That is the bar on the fitting aspect of your display screen above your consumable objects. It refills as you land pictures, and you may spend the gauge on Coatings and Tracer Arrows.
- Press X whereas charging a shot to spend Trick Arrow Gauge by readying a Tracer Arrow. The Tracer Arrow will embed itself the place it hits a monster, and each shot you hearth whereas it is energetic will residence in on the tracer arrow. Ultimately, the Tracer Arrow will detonate, dealing extra harm.
- Press B whereas charging a shot to begin aiming an Arc Shot. It will place a reticle on the bottom, and firing the shot will rain arrows from the sky. A few of these arrows might be Fuse Arrows, which embed themselves and finally detonate like Tracer Arrows.
- Holding LB will let you choose a Coating by pushing A and Y. Press Y with out holding LB or charging a shot to use a Coating. I am going to run by the Coating varieties under.
Whereas charging a shot, press B+Y to carry out Thousand Dragons. This can be a large unfold of arrows with a brief vary by default, however when you might have a Tracer Arrow or Fuse Arrow energetic, these pictures acquire vary and can instantly detonate the Tracer. Dragon Piercer may also detonate Fuse Arrows and Tracers.
Maintain RB whereas aiming with LT to organize Focus Fireplace, the Bow’s Focus Strike. It will activate a bigger aiming reticle, letting you lock onto each monster wounds and energetic Tracer arrows. The longer you intention at wounds or Tracers, the extra arrows you may hearth.
Coating Varieties
Every Bow permits using a restricted number of Coating Varieties, however you possibly can allow different Coatings for that bow with Decorations. Energy Coating will increase arrow harm. Shut-Vary Coating reduces your efficient arrow vary, however will increase harm. Piercing Coating causes arrows to pierce by a monster and deal a number of cases of injury, like small variations of the Dragon Piercer.
Poison, Paralysis, Sleep, Blast, and Exhaust coatings all apply their respective statuses.
Finest Monster Hunter Wilds mods
Monster Hunter Wilds weapon tier listing
Monster Hunter Wilds finest armor
Monster Hunter Wilds decorations
Monster Hunter Wilds monsters
Monster Hunter Wilds occasion quests
Monster Hunter Wilds multiplayer
Placing all of it collectively
Dealing essentially the most harm with Bow entails utilizing Charging Sidestep to shoot and dodge as much as most cost degree after which persevering with to alternate pictures and dodges to pump out max degree arrows and Energy Pictures, finally ending your combo with a pair Energy Pictures or a Dragon Piercer.
- When you land Tracer Arrows and Fuse arrows earlier than your combo, you possibly can add an additional layer of injury by finally triggering their detonations with a Dragon Piercer or Thousand Dragons.
- Timing good dodges with Charging Sidestep will refill your stamina, permitting you to proceed your shot combo.
Finest Bow construct in Low Rank
|
Weapon |
Helmet |
Chest |
Arms |
Waist |
Legs |
Talisman |
|
Wild Energy Bow I |
Bone Helm |
Bone Mail |
Balahara Vambraces |
Balahara Coil |
Balahara Greaves |
– |
|
Windbrace Bow I |
Hirabami Headdress |
Hirabami Mail |
Balahara Vambraces |
Balahara Coil |
Balahara Greaves |
Health Allure I |
|
Albirath Bow I |
G. Rathalos Helm |
Rey Sandmail |
G. Rathalos Vambraces |
Xu Wu Coil |
Xu Wu Greaves |
Health Allure I |
The Bow is without doubt one of the most stamina-reliant weapons in Monster Hunter. Sadly, one of the best stamina administration expertise—Structure and Stamina Surge—aren’t simply accessible till later in Low Rank. Till then, we’ll be specializing in armor expertise that make our basic gameplay as easy as doable.

- First weapon: Wild Energy Bow I
All through this construct information I will be suggesting bows that, just like the The Wild Energy Bow I, permit using the Energy Coating, which offers additional arrow harm when energetic. The Wild Energy Bow additionally gives a number of standing coatings as a pleasant bonus, so you possibly can dabble with these and really feel out your personal preferences for later bow builds if you would like.
It might be value performing some mining to make a Dragon Perforator I, nonetheless. It permits using the Pierce Coating, which makes every of your arrows punch by the monster and deal harm because it passes by each damageable half alongside the way in which. If you find yourself preferring how that feels over the Energy Coating, I might advocate making a Rey Perkonis I when that tier of the Smithy unlocks, and utilizing that during Low Rank.
- First armor set: Bone Helm, Bone Mail, Balahara Vambraces, Balahara Coil, Balahara Greaves
Our greatest stamina administration expertise aren’t out there till in a while in Low Rank, so we’ll should take what we are able to get. The Bone items present Marathon Runner, which decreases stamina utilization for actions that steadily drain stamina, like charging arrow pictures. Ideally, we’ll wish to be dodging and capturing as a lot as doable, however it’s not likely possible at this level. Marathon Runner will assist us get extra pictures out till our armor helps it.
Talking of dodging, Balahara gear provides Evade Extender, rising our dodge distance. It is nearly at all times value grabbing for basic consolation if you happen to’ve obtained the gear or ornament house.

- Second weapon: Windbrace Bow I
We proceed our survey of Energy Coating bows with the Windbrace Bow, a Hirabami Bow that provides some ice harm, although it’s going to value us our different coatings. It additionally has a number of innate factors in Focus, which hastens assault charging. Since we will not take advantage of out of the dodge-and-shoot playstyle fairly but, we’d as nicely velocity up our charging so we’re spending much less stamina doing it.
- Second armor set: Hirabami Headdress, Hirabami Mail, Balahara Vambraces, Balahara Coil, Balahara Greaves, Health Allure I
You would be completely superb conserving the primary armor set and dropping in a number of armor spheres for some additional protection, however if you happen to’re excited about a change, you can decide up some Hirabami items whereas constructing your Windbrace Bow. They will offer you a pair factors within the Evade Window ability, rising the invincibility frames of your dodge. In flip, it’s going to be simpler to carry out the Discerning Dodge, which refills your stamina everytime you efficiently dodge a monster assault.
Extra necessary, nonetheless, is making our first talisman: Health Allure I. It will present us with our first Structure ability level, offering a flat deduction on each dodge and arrow shot, making the bow’s shoot-and-scoot playstyle way more manageable.

- Third weapon: Albirath Bow I
We’re swapping ice for hearth. The Albirath Bow provides us extra bodily harm, extra elemental harm, a better crit probability, and Blast Coating. It additionally provides a degree in Ballistics, barely rising the utmost efficient vary of our arrows. It will additionally synergize nicely with a pair armor items from our third armor set.
- Third armor set: G. Rathalos Helm, Rey Sandmail, G. Rathalos Vambraces, Xu Wu Coil, Xu Wu Greaves, Health Allure I
A number of modifications right here—and for the higher. We have lastly hit the purpose the place stamina expertise are extra accessible. We’ll proceed pumping our Structure ability with the Rey Sandmail chest armor, and we’ll additionally get Xu Wu waist and leg armor, giving us two factors in Stamina Surge to extend our stamina regen charge.
With the G. Rathalos Helm and G. Rathalos Vambraces, we get somewhat little bit of offense from our armor thanks to 2 factors within the Weak point Exploit ability, including additional harm after we hit monster weak spots and land Focus Strikes on wounds (which we do a variety of with the Bow). With these two items, we additionally get the Scorcher I set bonus, giving our assaults an opportunity to do an additional chip of fireplace harm—a pleasant complement to our Albirath Bow.
Finest Bow construct in Excessive Rank
|
Weapon |
Helmet |
Chest |
Arms |
Waist |
Legs |
Talisman |
|
Albirath Bow II |
Kut-Ku Helm β |
Gypceros Mail β |
Kut-Ku Vambraces β |
Gypceros Coil β |
Conga Greaves β |
Health Allure II |
|
Entbehrung I |
G. Rathalos Helm β |
G. Rathalos Mail β |
G. Ebony Braces β |
G. Ebony Coil β |
G. Rathalos Greaves β |
Chain Allure I |
|
Verzweiflung |
G. Ebony Helm β |
Arkvulcan Mail β |
G. Ebony Braces β |
Arkvulcan Coil β |
Udra Miregreaves β |
Chain Allure II |
- Fourth weapon: Albirath Bow II
We’ll work our method to an Albirath Bow improve as we dip our toes into Excessive Rank, however quickly we’ll be switching to a distinct path of the Bow tree. Do your self a favor and toss in a pair regular Rathalos hunts to construct a Darkish Filament bow, as a result of we’ll need the Gore Magala bow tree unlocked as we proceed.
- Fourth armor set: Kut-Ku Helm β, Gypceros Mail β, Kut-Ku Vambraces β, Gypceros Coil β, Conga Greaves β, Health Allure II
We’re setting apart our offensive good points from the top of low rank for across-the-board stamina administration to make our transition into Excessive Rank comfy. A mix of Kut-Ku and Gypceros items provides us wholesome ranges of Stamina Surge and Structure, and we have a number of slots to drop in some additional factors of Evade Extender if we need.
- Fifth weapon: Entbehrung I
We strategy our endgame bow selection with the Entbehrung I, a Gore Magala bow with good assault values, a lovely 20% crit probability, and a very good chunk of Dragon elemental harm. It additionally comes with maxed Vital Aspect, in order that Dragon harm will improve each time we crit. When you’ve obtained a Vital Increase jewel to drop in its 3-slot, all the higher. That’ll pair nicely with our subsequent armor upgrades. Talking of:
- Fifth armor set: G. Rathalos Helm β, G. Rathalos Mail β, G. Ebony Braces β, G. Ebony Coil β, G. Rathalos Greaves β, Chain Allure I
G. Rathalos armor and Weak point Exploit makes a triumphant return to benefit from our Gore Magala bow’s crit probability and Crit Aspect. It is joined by a number of G. Ebony items and a Chain Allure I to offer us a near-maxed Burst ability, which offers an rising assault and affinity bonus as we land repeated assaults on a monster. As we shoot, we’ll regularly stack additional harm and land extra crits. What’s to not love?
Fill these ornament slots with some Structure and Stamina Surge jewels and 2-slot jewels of your selecting. Partbreaker’s not a foul possibility, because the bonus harm on wound destructions pairs rather well with our easily-accessible Focus Strikes.

- Endgame weapon: Verzweiflung
As above, the fully-upgraded Gore Magala bow is a beautiful package deal of assault stat, crit probability, dragon harm, and Vital Aspect. Drop a Vital Increase jewel in, and also you’re good to go for hammering monsters with heavy crits.
- Endgame armor set: G. Ebony Helm β, Arkvulcan Mail β, G. Ebony Braces β, Arkvulcan Coil β, Udra Miregreaves β, Chain Allure II
This last armor set is taking the thesis established by our final Excessive Rank set and operating with it to its endpoint. As earlier than, we’re pairing Burst and Weak point Exploit to pair elevated crit probability with escalating assault and affinity bonuses. The addition of an upgraded Chain Allure II and Tier 3 ornament slots imply we are able to max each expertise, and have a number of ornament slots left over to get our stamina administration expertise to a snug degree.
Extra Monster Hunter Wilds on PC Gamer

- Monster Hunter Wilds Lengthy Sword builds
- Monster Hunter Wilds Nice Sword builds
- Monster Hunter Wilds Cost Blade builds
- Monster Hunter Wilds Twin Blades builds
- Monster Hunter Wilds Insect Glaive builds
- Monster Hunter Wilds Hammer builds
- Monster Hunter Wilds Swap Axe builds
- Monster Hunter Wilds Mild Bowgun builds
- Monster Hunter Wilds Heavy Bowgun builds
- Monster Hunter Wilds Sword and Protect builds
- Monster Hunter Wilds Lance builds
- Monster Hunter Wilds Gunlance builds
- Monster Hunter Wilds Looking Horn builds

- Monster Hunter Wilds character codes
- Monster Hunter Wilds artian weapons
- Monster Hunter Wilds secret armor
- Monster Hunter Wilds layered armor
- Monster Hunter Wilds roadmap
The most important gaming information, evaluations and {hardware} offers
Maintain updated with an important tales and one of the best offers, as picked by the PC Gamer crew.